
Are you feeling overwhelmed about wall mounting your TV? Don’t worry – it’s easier than it seems. This guide will walk you through the steps so you can handle it, even as a DIY newbie.
I’ll cover where to put your TV, choosing the right mount, the tools you’ll need, and, yes, drilling holes. If it still seems too tricky, you can always hire a pro. But with these tips, you can totally do this yourself!
Key Points
- Choose the right wall mount for your TV and wall type – consider a fixed, tilting or articulating mount.
- Find and mark the wall studs if mounting on drywall. Use a stud finder or knock to locate them.
- Attach the mount bracket to the TV, then mark and drill pilot holes in the wall.
- Line up the mounting plate with the holes and secure with bolts. Tighten all bolts evenly.
- Carefully lift and hang the TV on the mounted bracket. Manage cables neatly with ties or clips.
One Step at a Time
Tools:
- Drill and a masonry or wood drill bit (depending on your fixing surface)
- Large Phillips screwdriver
- Spanner or socket set
- Tape measure
- Spirit level (aka bubble level or level)
- Wall stud finder (optional)
Supply:
- 1x TV wall mount
- Pencil
- Masking tape (aka painter’s tape)
Total Time: 45 minutes
Step 1: Unpack the Mount

Take the wall mount from the packaging and make sure you have all the parts and fixings.
There are two main components:
- A bracket or plate that attaches to the back of the TV.
- The mount for securing to the wall.
Separate the two parts and all the fixings so you don’t get everything mixed up.
Step 2: Attach the Bracket to the Back of the TV

Check the instructions for your mount and install the correct part to the television’s rear. Wall mounts have different ways of attaching to the TV – some have a mounting arm, and some have a TV mounting plate.
You will need to secure the plate using the correct VESA hole configuration. You should also check your TV’s instructions for the correct screw size, which should come in the packaging with your wall mount.
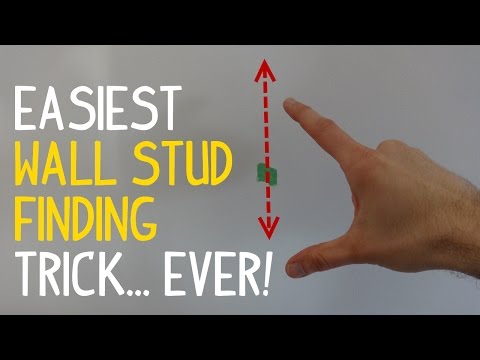
Step 3: Find the Wall Studs

If you are installing on drywall, you must drill into the center of the wood stud, or the wall won’t support the weight of your TV and mounting bracket.
The easiest way to find the studs is to use an electronic stud finder – or there are tricks to find the wall studs without a detector.
Some people knock on the wall to hear where the studs are. I recommend something more precise unless you’re confident in your skills.
Mark the center of the studs on the wall with a pencil. If your wall is concrete or brick, you can skip this step.
Step 4: Mark the Wall for the Plate

Place your wall mount plate on the wall and use it as a template to get the fixing holes in the right place. Some mounts include a paper template, so use this if you have one, as it’s easier than holding up a heavy metal plate.
Use a level to make sure the wall bracket is straight, and then mark the position of the holes with a pencil.
Step 5: Check You Have Everything at the Correct Height

Before drilling the wall, it’s good to check that you have marked everything at the correct height.
Temporarily place the wall plate on the back of your flat panel TV and measure the top and bottom edges of the television from the wall plate holes. Then, mark the top and bottom of the TV on the wall with a pencil or painter’s tape.
Stand back and make sure the TV will is at the right height.
Step 6: Drill the Pilot Holes

Check the wall mount instructions and find the correct drill bit size, which can vary depending on the type of wall. Drill a pilot hole for each place you have marked on the wall.
Step 7: Secure the Wall Mount

Place the plate on the wall and line it up with the pilot holes. Get the fixing bolts and screw each one into the plate with a screwdriver or ratchet.
Screw each bolt part of the way first, then tighten each one completely when all are in place. Don’t over-tighten the bolts; just enough so the plate is solid.
Doing this with two people will be easier, one to hold the plate and the other to tighten the bolts.
Step 8: Hang the TV

Carefully lift the TV and hang it on the mount. Your instructions will tell you exactly how it should attach, but generally, the plate or bracket on the back of the TV will clip into the mount on the wall.
Unless you have a small TV, it is best to use two people to lift the screen into place.
Step 9: Connect the Cables

Attach all the necessary cables to the TV using the cable management features of the TV bracket to keep things tidy. Cheap ties and clips can also work wonders to control those pesky wires.
If the cables connect to the back of the TV, and you don’t have enough space, go back to step 8 and connect the cables before you hang the TV on the mount.
You can also use right-angle connectors on the cables if there isn’t enough space between the back of the TV and the wall.
Before You Begin
Before you break open your toolbox, there are several things you need to consider. You mustn’t skip this part because it will make installing your TV much easier.
Choose the Correct Type of Wall Mount
There are three main types of TV wall mounts:
- Fixed: a low-profile mount that keeps your TV close to the wall and offers little movement. It’s the most discrete option, but you can’t move the TV position much after you’ve installed it.
- Tilting: similar to a fixed bracket but allows the TV to tilt up or down. It is ideal if you have glare from windows in the room during the day.
- Articulating: an adjustable TV wall mount allows you to move the TV away from the wall and into different positions. The main options for a full motion mount are to swivel from side to side – or tilt up or down. You will need one of these if you want to move the TV to different viewing locations.
For a complete overview of each type of mount, check out the guide to the best TV mounts.
Main takeaway: Buying the correct mount type for your situation can save you a lot of headaches in the future.
What Are Your Walls Made From?
Most TV wall mounts allow fixing to a brick or concrete wall – or drywall with wood studs.
For a concrete and brick wall, you should have no issues. But you must ensure you have the correct drill bit and fixings for that wall type.
For drywall, you need to know the following:
- Where the wall studs are. Are they in the right place for where you want to mount the TV?
- How far apart are the studs? Make sure you buy a mount that supports the distance between each wooden stud.
Main takeaway: Make sure the mount you buy is suitable for the wall surface.
Where Do You Want to Install Your TV in the Room?
In some rooms, you have little choice where you can mount the TV. If so, you will have to work around the limitations. If you have a choice, think about the following issues:
- Is the wall suitable for attaching a mount?
- Try to avoid reflections from windows during the day or room lights at night.
- Can you place the TV at the correct height? Ideally, you want the center of the screen at eye level.
- Which location gives the best viewing distance?
One tip is to cut some wood or cardboard to the exact dimensions of your TV. Place this mock-up around the room to get an idea of where the best fit would be.
Main takeaway: Picking the best location for your wall-mounted TV now will save you from moving the TV again later.
Check the Specification of Your TV
Before buying your TV mount, you should check a couple of things on your television:
- VESA specification: does your TV have mounting holes on the back, and how far apart are they? Then, make sure the bracket you buy will fit the VESA hole spacing of your TV. The larger the TV, the bigger the distance between the mounting holes. Standard sizes are 100mm x 100mm or 400mm x 400mm.
- TV’s Weight: how heavy is your TV? TV wall mounts support a maximum weight.
- TV Size: every mount will suggest a minimum and maximum TV size, which is an excellent general guideline to follow.
You can look at the manual for your TV or find the specifications on the manufacturer’s website.
Main takeaway: Buy a wall mount suitable for your flat-screen TV.
What Tools Do You Need?
The tools you will need for wall mounting a TV are pretty basic. It might vary depending on the type of mount that you buy, but in most cases, you should need:
- a drill and a masonry or wood drill bit (depending on your fixing surface).
- a large Phillips screwdriver for connecting the plate to the TV.
- a spanner or socket set for securing the bolts to the wall.
- a pencil or masking tape (aka painter’s tape) for marking the wall before drilling.
- a tape measure.
- a spirit level (aka bubble level or level) – to make sure your mount isn’t wonky.
- wall stud finder (optional – if you have drywall with wall studs). If not, find out how to mount a TV on the wall without studs.
Many people will have these in their toolboxes already.

Most wall mounts will come with all the necessary fixings – screws for putting together the mounting plate and attaching it to the TV and bolts and fixings for securing the bracket to the wall.
However, there are many different screw sizes, especially for securing the plate to your TV.
So, if you don’t have the correct fixings, the better brands will send you what you need if you contact their helpdesk.
Alternatively, if you know what you are doing, going to your local hardware store and getting the right size fixings might be quicker. They are all standard sizes.
You will only need a stud finder if you have drywall with wooden studs. And, even then, there are ways of finding the studs without buying a tool:
Whichever way you choose, you must drill into the center of the studs for most mounts if you have drywall.
FAQ: How to Put a TV Mount on the Wall
Here are some quick-fire questions and answers about how to put a TV mount on the wall.
Can You Mount a TV on the Wall by Yourself?
You can mount a TV by yourself, but it is easier with two people. Most tasks are easy for one person, but the tricky part is screwing the mount to the wall, which is easier if one person holds the mount and another tightens the bolts.
Can You Mount a TV to Just Drywall?
You will need to buy a specially designed bracket to mount a TV to drywall. Most TV wall brackets secure into wood studs in drywall, and you must not try and install these in a wall with no studs. However, a few mounts will attach to a studless drywall, so you can buy one of those.
Can You Mount a TV without Damaging Walls?
Any standard TV mount will require you to drill a hole into the wall. Some studless mounts only require nails, but most will attach using large bolts. If you don’t want to damage the wall at all, consider a TV stand, a cabinet, or a ceiling mount.
About The Author
Paul started the Home Cinema Guide to help less-experienced users get the most out of today's audio-visual technology. He has been a sound, lighting and audio-visual engineer for around 20 years. At home, he has spent more time than is probably healthy installing, configuring, testing, de-rigging, fixing, tweaking, re-installing again (and sometimes using) various pieces of hi-fi and home cinema equipment. You can find out more here.


