Optical audio cables can easily improve your TV’s sound by connecting to external speakers. Learning how to connect an optical cable is easy, but there are a couple of gotchas that you should know.
Here are the basics:
- Identify the optical output; if there’s a protective plastic cap, remove it.
- Locate the input; again, remove the protector if required.
- Connect the optical cable to your TV’s output.
- Carefully route the wire to your amplifier or soundbar and plug it in.
- Set the TV audio output to ‘optical’ or ‘digital out.’
- Turn on your amplifier or soundbar and test the audio.
For more details, follow this guide and learn how to plug in an optical audio cable to your TV, home theater system, cable box or soundbar.
Main Topics
How to Plug in an Optical Cable

The basic steps are similar whether you connect your TV to a soundbar or home theater system. And the source doesn’t have to be a TV – you can also connect a Blu-ray player, DVD player or cable box to a sound system with optical audio.
Remember, your TV, Blu-ray player, or cable box will need an optical output. You will connect these to a soundbar, home theater or amplifier with an optical audio input.
However, connecting an optical cable is easy if you follow these simple steps:
Total Time: 5 minutes
1. Check if the Optical Output Connector Has a Protective Cap
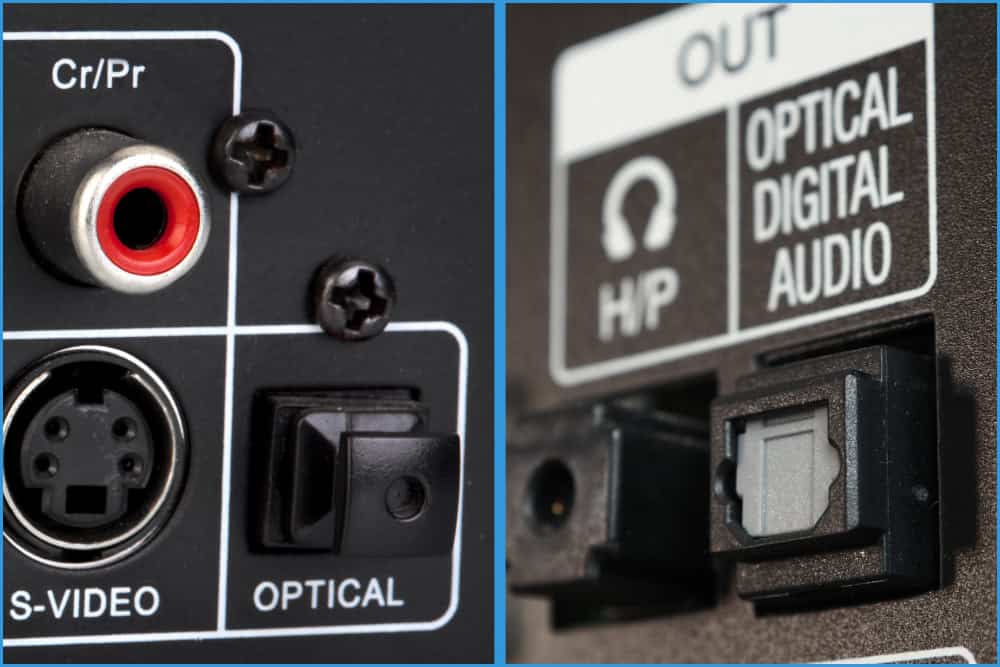
Some optical ports have a protective cap for when they aren’t being used.
If your TV has one of these – pull it out. Put it somewhere safe in case you stop using the optical connection in the future.
Other TVs might simply have a protective door, which will move out of the way when you push the cable in.
The same applies to connecting a cable box or DVD player – make sure the protective cap is removed.
2. Find the Optical Input Connection on Your Home Theater Amplifier or Soundbar
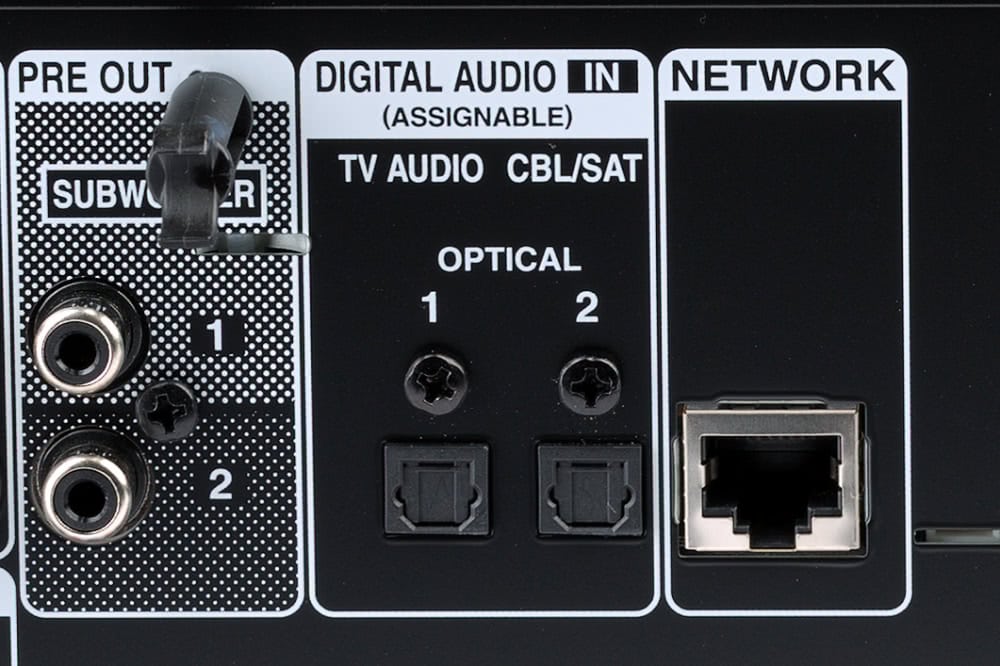
As with your TV, check that the optical input on your soundbar or amplifier has no plastic plug.
If it has, then remove it. If not, you should be able to plug in the cable easily.
3. Connect the Optical Audio Cable to Your TV or Cable Box

Some cables also have a protective cap, so remove this before you try and plug it in.
Connect one end of your optical audio cable to the optical output on the rear of your TV. Just make sure that you match the shape of the cable’s connector with the connection on your device.
The design of an optical port means it will only plug in when you line it up correctly. Don’t force it.
When you align it correctly, it will snap into place quite easily.
4. Connect the Optical Audio Cable to Your Amplifier or Soundbar
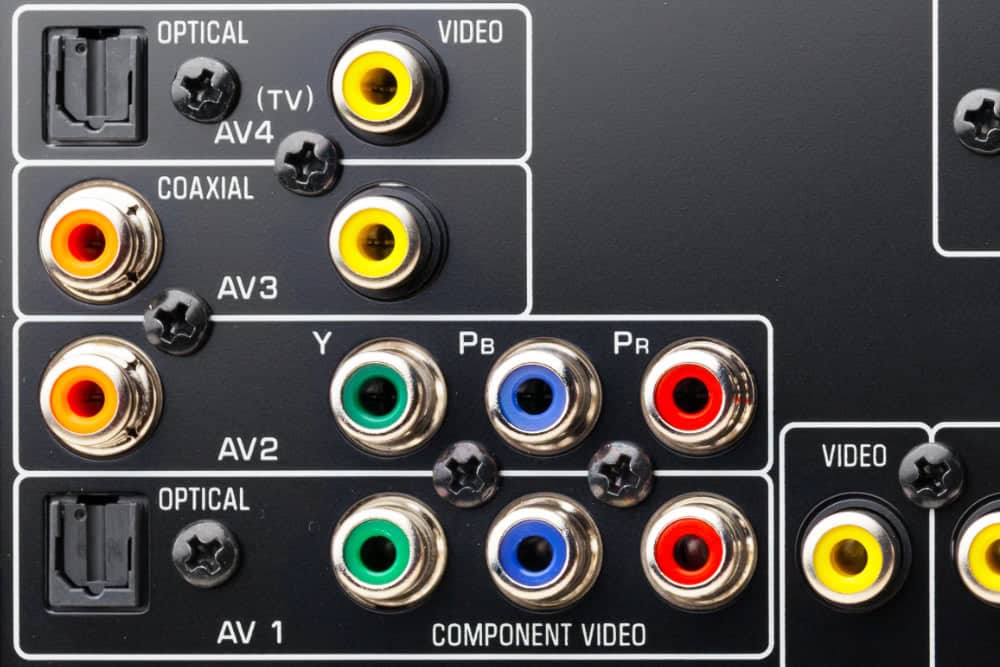
Run the optical cable from the TV or cable box to your amplifier or soundbar.
Locate the optical audio input on the rear of your home theater system and plug the cable in.
There may be more than one, so note the label – in this case, AV1 and AV4.
This will help you select the correct audio source later.
Again, the cable’s connector will only fit one way, so line it up with the shape of the port.
Try to avoid tangling it with other wires in your system.
5. Turn on Your TV or Cable Box
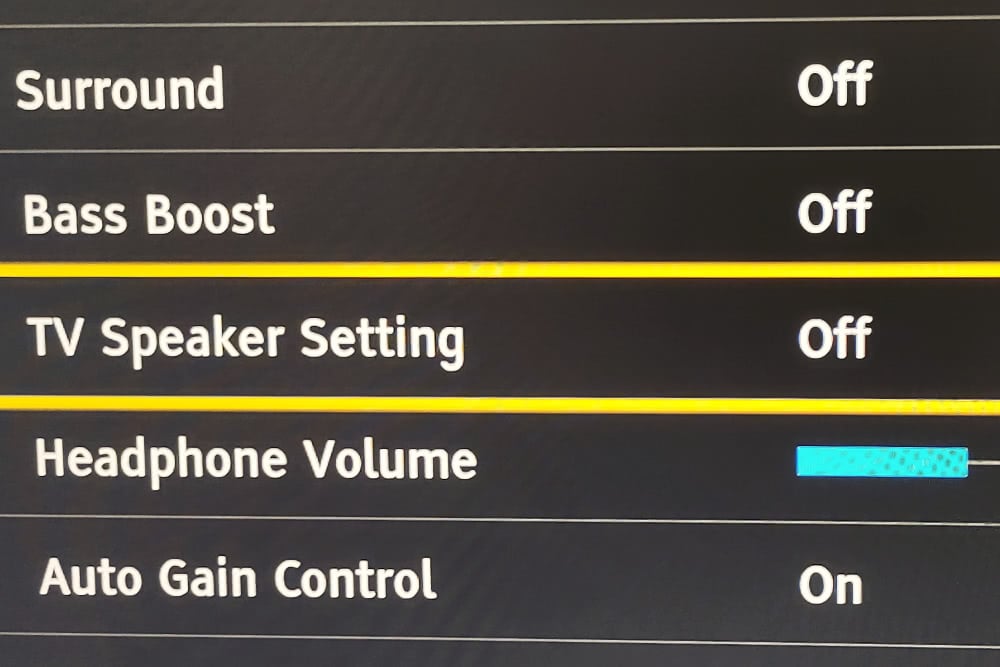
Go to the TV’s audio menu and ensure the audio output is set to ‘digital out.’
The optical output may work on some models without enabling it in the audio menu. In this case, disabling the TV speaker in the audio menu is usually a good idea.
A cable box will often have the optical port enabled already, but if you get no sound, check the audio menu for the box and see if the digital output needs switching on.
6. Turn on Your Amplifier or Soundbar
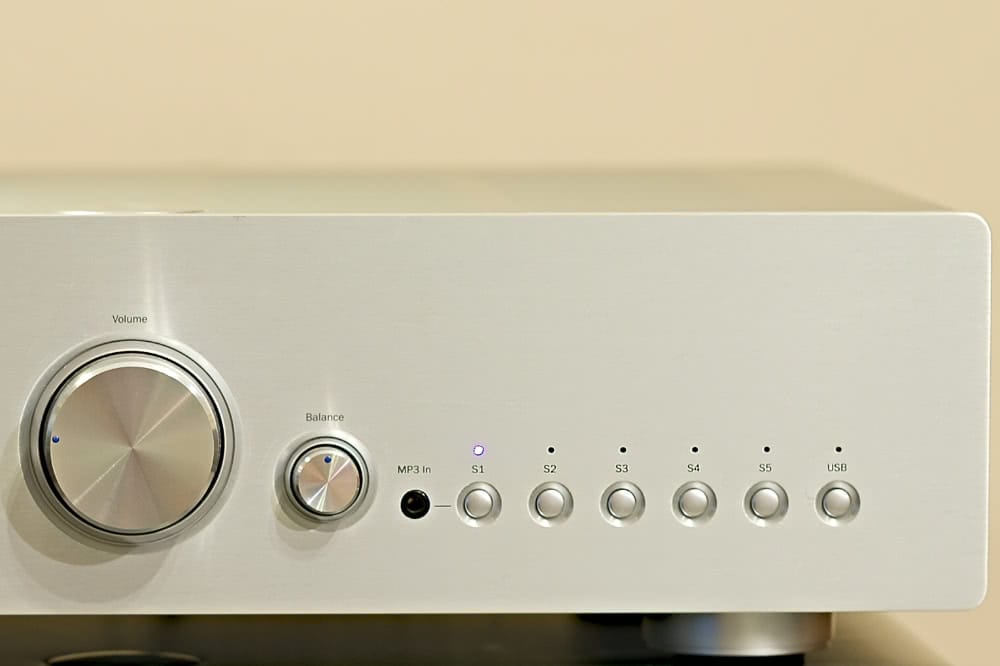
For an amplifier, select the correct audio input source. This will be the optical port that you connected previously.
There may only be one, but some systems have multiple digital inputs, so make sure that you select the right one.
A soundbar usually only has one optical input and should work without selecting any inputs.
Supply:
- 1x male-to-male optical digital audio cable
Tools:
- No tools required – maybe some cable ties to tidy the wires after
Which Optical Cable Should You Buy?
You don’t need to spend a fortune on an optical cable.
Buying a very cheap wire might result in connection problems due to poor construction, materials and quality control.
However, at the same time, you don’t need to spend an excessive amount either, as it won’t sound any better.
The only time where spending a little more is sometimes worthwhile is if you are looking for a very long cable run.
For short runs, almost anything should do.
Here are some popular optical cables that should do the job just fine.
Apart from the price, some factors to consider are the available cable lengths and the materials used for the shielding and connectors.

- Size: 3 feet to 100 feet
- 24K gold-plated connectors
- Flexible PVC jacket

- Size: 3.3 feet to 15 feet
- Slim braided cable
- Flexible design for easy install

- Size: 3 feet to 20 feet
- Great value
- Ultra-thin cable
Frequently Asked Questions
What if Your TV Does Not Have an Optical Output?
If you need to connect to a sound system that only has an optical input, then you will need to buy an audio adapter to convert the audio that your TV does support. You can purchase coaxial digital audio to optical converters. Or HDMI audio extractors to convert HDMI audio to optical. You can even get converter boxes to change stereo RCA analog audio to optical audio.
Can You Use HDMI and Optical Audio at the Same Time?
It depends on the device. Most devices will send audio through their HDMI and optical outputs at the same time. If not, you could buy an HDMI audio extractor, which will allow you to take the HDMI audio and output it in different audio formats. This will enable you to connect to other devices.
Is It Better to Connect Your Soundbar with HDMI or Optical?
If you have a choice, then it would usually be best to connect a soundbar with an HDMI connection. This is mainly because HDMI connections allow for more audio formats, and you can control your devices using HDMI CEC commands. However, an optical connection will be fine if you just need stereo audio or Dolby Digital and DTS 5.1 surround sound.
About The Author
Paul started the Home Cinema Guide to help less-experienced users get the most out of today's audio-visual technology. He has been a sound, lighting and audio-visual engineer for around 20 years. At home, he has spent more time than is probably healthy installing, configuring, testing, de-rigging, fixing, tweaking, re-installing again (and sometimes using) various pieces of hi-fi and home cinema equipment. You can find out more here.


